Window tinting is an effective way to improve your home’s comfort, privacy, energy efficiency, and UV protection. While hiring a professional is always an option, many homeowners choose to install window tinting themselves. It can save money, and with the right tools and patience, you can achieve a great result. If you’re considering installing window tint on your own, this step-by-step guide will walk you through the entire process.
What You’ll Need
Before starting, make sure you have all the necessary tools and materials for the job. Here’s what you’ll need for installing home window tinting:
- Window tint film (sized to fit your windows)
- Utility knife or razor blade
- Squeegee
- Spray bottle with soapy water solution (mix dish soap with water)
- Lint-free cloth or paper towels
- Measuring tape
- Plastic scraper or credit card
- Heat gun or hairdryer (optional)
- Gloves (to avoid fingerprints on the film)
Step 1: Measure and Cut the Window Film
The first step is to measure the windows you plan to tint. Use a measuring tape to measure the height and width of each window. It’s important to measure twice to ensure accuracy.
Once you have the measurements, you’ll need to cut the window tint film. Lay the film on a clean, flat surface (preferably a table) and mark the dimensions on the film. Be sure to add an extra inch or so around each edge to ensure the film fully covers the window.
- Tip: Window tint film can stretch, so it’s always better to cut slightly larger than too small. You can trim the excess later.
Step 2: Clean the Window
Proper cleaning is crucial to ensure a smooth application of the film. Any dirt, dust, or grease will affect the adhesive and could cause bubbles or imperfections in the final product.
- Use a glass cleaner or a mixture of vinegar and water to clean the window thoroughly.
- After cleaning, wipe the window down with a lint-free cloth to ensure no fibers are left behind.
Be sure the window is completely dry before proceeding.
Step 3: Wet the Window
Once your window is clean, it’s time to prepare the surface for the tinting. Using a spray bottle filled with soapy water (just a few drops of dish soap in water), generously spray the window. The soapy water helps the window film slide into place during the application process.
- Tip: Don’t worry if the window is wet; this will help with the installation and will evaporate later.
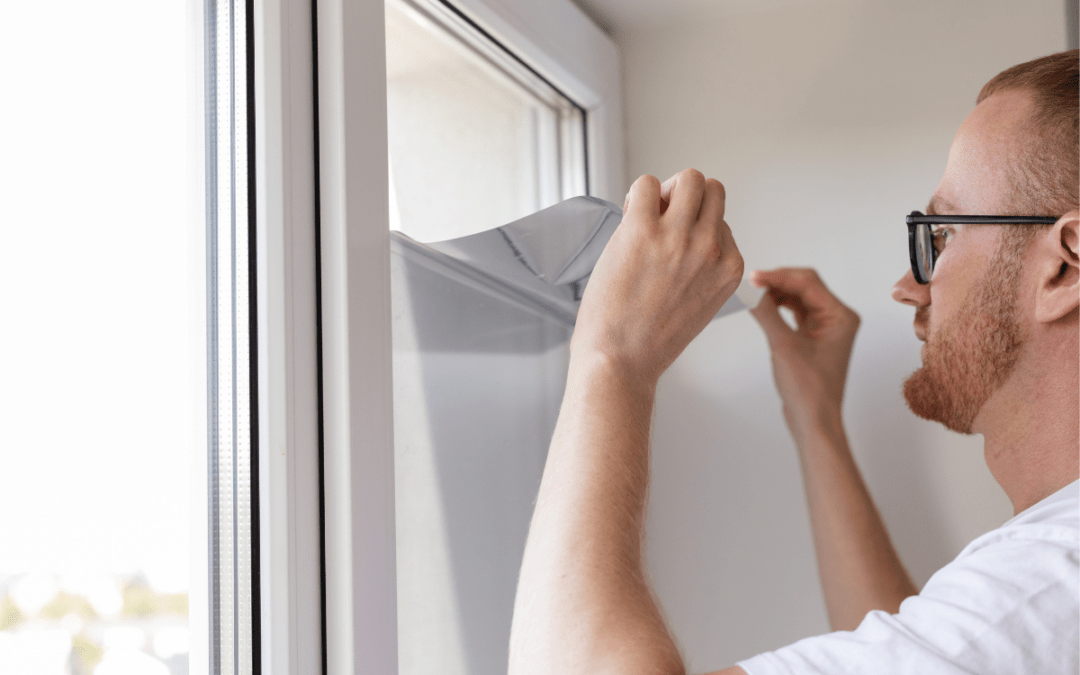
Step 4: Peel and Apply the Window Tint Film
Now that your window is prepared, you’re ready to apply the film. Begin by peeling the backing from the window tint film, starting at one corner. Be careful not to touch the adhesive side of the film, as this could leave fingerprints.
- Hold the film by the edges, and gently place it on the wet window.
- Once the film is positioned, use your hands to align it, ensuring it covers the entire window.
- Tip: Make sure the tinted side is facing the window, not the outside. If you have trouble positioning it, don’t worry—you can gently peel the film off and reapply it as long as the adhesive side hasn’t dried out.
Step 5: Smooth Out the Bubbles and Wrinkles
After the film is in place, use a plastic scraper, a credit card, or a squeegee to press the film against the window. Start from the center and work your way out toward the edges. This will help remove any bubbles or wrinkles in the film.
- Tip: Work slowly and methodically. It’s important to ensure the film is smooth and free of air pockets. If you encounter stubborn bubbles, you can use a small pin to pop them and then smooth the area.
If you notice any stubborn wrinkles or creases, you can carefully use a heat gun or hairdryer to soften the film and smooth it out. Hold the heat gun or hairdryer a few inches from the film and gently heat the area to make it more pliable. This will make it easier to smooth the film out.
Step 6: Trim the Excess Film
Once the film is smooth and positioned correctly, it’s time to trim any excess film along the edges. Using a utility knife or razor blade, carefully trim the film along the edges of the window, leaving a small margin to ensure the film stays in place.
- Tip: Take your time with trimming to ensure a clean, straight edge. Don’t cut too close to the window’s frame—leave a little extra to ensure a snug fit.
Step 7: Let the Film Dry
After you’ve applied and trimmed the film, let it dry for at least 24 to 48 hours. During this time, the adhesive will bond to the window, and any remaining moisture will evaporate. Avoid touching or adjusting the film during this time.
- Tip: Keep the window closed and avoid any pressure or scrubbing to let the adhesive bond properly.
Step 8: Final Touches and Cleaning
After the film has dried and fully adhered to the window, clean the surface gently with a soft cloth to remove any remaining water or fingerprints.
- Tip: Avoid cleaning the window for the first few days to allow the film to cure properly. Once the curing process is complete, you can treat it like any other window, using non-abrasive cleaners.
Conclusion
Installing home window tinting is a cost-effective way to improve your home’s energy efficiency, reduce glare, enhance privacy, and protect your interior from harmful UV rays. While professional installation is always an option, DIY installation can be a rewarding project if you follow the steps carefully. With the right tools, patience, and attention to detail, you can achieve professional-looking results and enjoy the long-term benefits of window tinting in your home.
If you’re unsure about doing it yourself, consider consulting with a professional window tinting company like Tahoe Solar Film to help with the selection and installation of the best film for your needs.